The Content Manager allows you to manage and organize the contents of your organization’s Authoring Directory from within the HLC. You will create folders in your Authoring Center to organize your authored content. By default, your top-level folder is named Content. This folder cannot be renamed. You can add folders and sub-folders within the Content folder.
Note: Your Authoring Directory can also be managed outside the HLC through an FTP client. The Content Manager will reflect any changes made outside the HLC. See Connecting an HTML Authoring Tool to the Authoring Directory in this document for more information.
You can organize your Authoring Directory file structure as needed, as long as you follow these guidelines:
For any single piece of content, all assets must be included within a single content folder. When creating an authored learning activity, you will select a folder that includes all assets – HTML pages, images, and media files – used in that activity.
Your specified folder does not have to be a top-level folder, but all assets must be within it.
The selected folder can include sub-folders to organize content, but the HTML files must be organized at the root of that folder.
Files cannot be placed in the top level “/content” folder. They must be contained within a folder that is located within the top level “/content” folder.
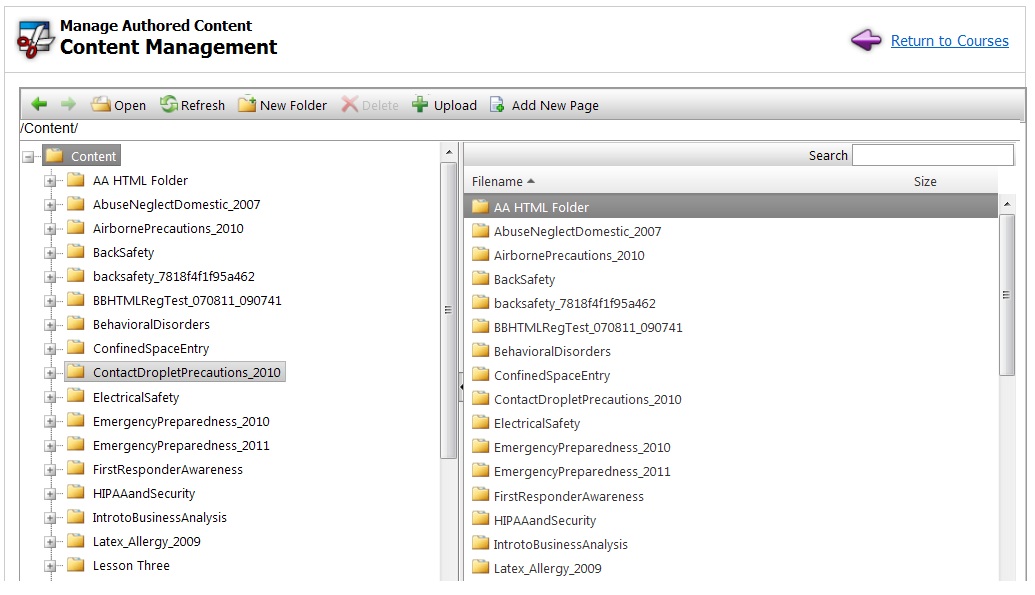
The Content Manager is laid out in a double-pane view similar to the view used in Windows Explorer. The left pane of the content manager displays only folders and sub-folders. To see the contents of any folder, select in within the left pane and all contents of that folder will display in the right pane.
There are three ways to access Content Manager:
Click Manage Authored Content from the Courses tab. This allows you to manage all files without accessing the Content Manager via the Course Builder. The Manage Authored Content link is only available to users with the Manage Authoring Files feature added to their administrator role.
When adding or editing a course, add an Authoring Center Activity, select the Common Properties, and click Save. See Adding an Authored Learning Activity for more information.
When managing an existing course that includes an Authoring Center Activity, click the Authoring Center Activity name from the Course Builder screen.
Click anywhere on the image below to see a description of that section.
Changes to the Content Manager may take a moment to display correctly as the HLC communicates with your Authoring Directory. If the Content Manager does not reflect changes correctly after copying files, making edits to pages, or renaming files, click the Refresh button to force the Content Manager to update.
By clicking the right button on your mouse within Content Manager, you can access a contextual menu that includes options from the main tool bar and some additional options, including:
Rename: Rename a file, folder, or page. See Renaming Files, Folders, and Pages for more information.
Copy: Copy a folder or file. The copied files are duplicated, and are not moved from their original location. See Copying Files, Folders, and Pages for more information.
Paste: Paste a copied folder or file to a new location.
Download Folder/File: Download the folder or file to your local computer. See Downloading Files, Folders, and Pages for more information.
![]()